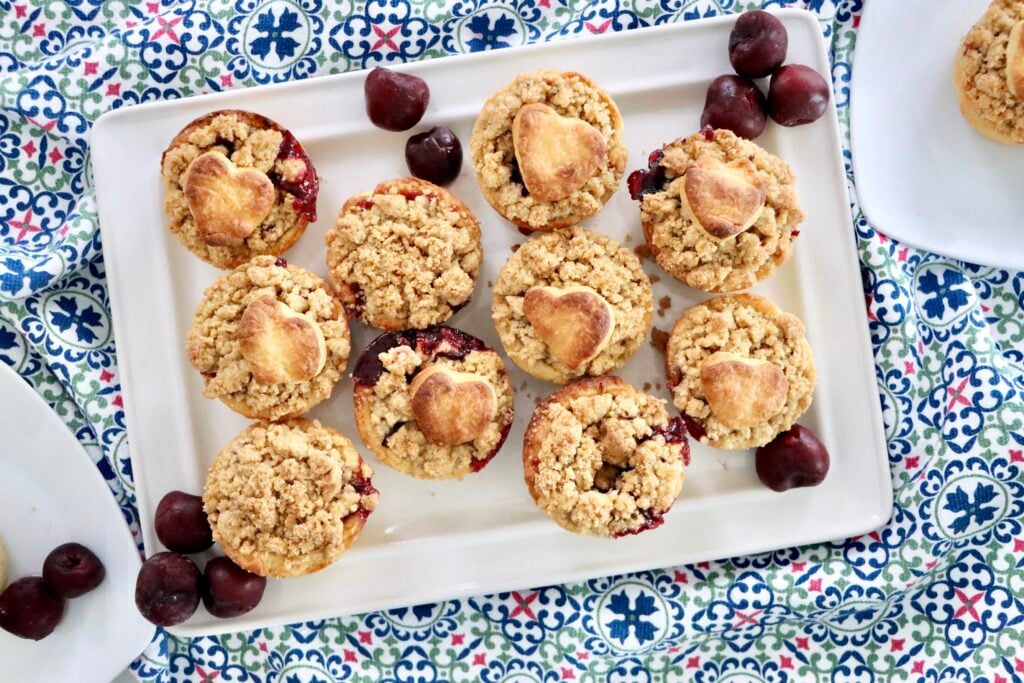
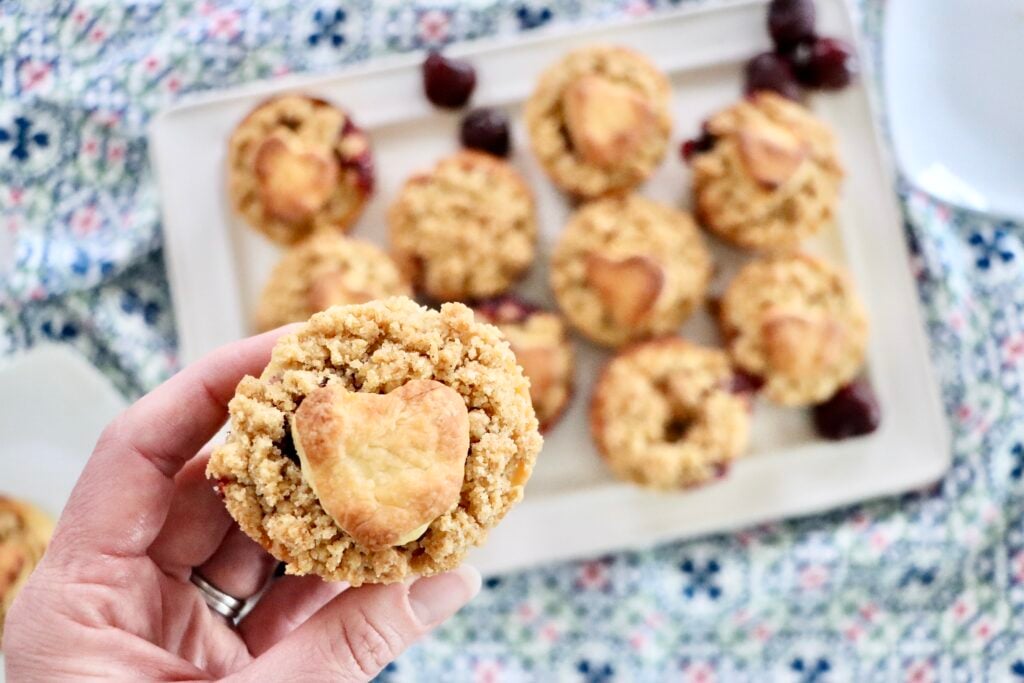
Mini Dutch Cherry Pies (Easy Muffin Tin Cherry Pie with Crumb Topping)
These Mini Dutch Cherry Pies are baked in a muffin tin with homemade cherry pie filling and buttery crumb topping. Easy, from-scratch and the perfect handheld dessert!
This post may contain affiliate links. As an amazon associate I earn from qualifying purchases at no additional cost to you.
I LOVE individual desserts — especially when they’re made completely from scratch.
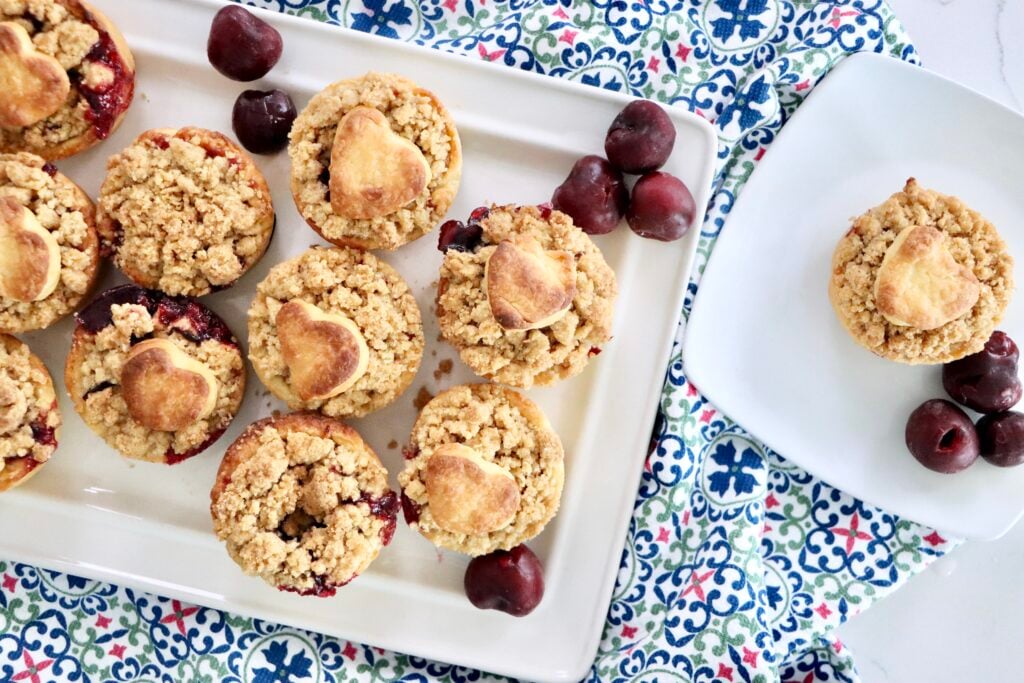
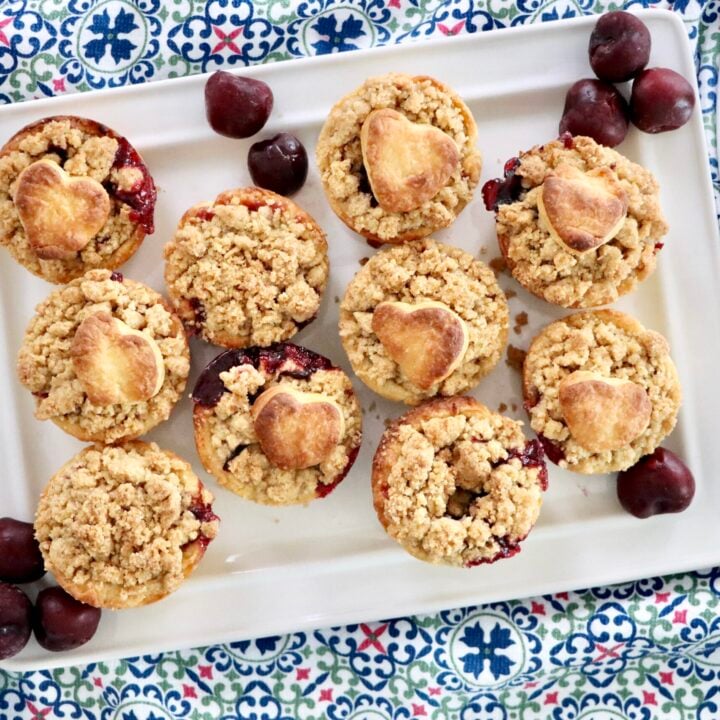
These Mini Dutch Cherry Pies are baked in a muffin tin, filled with homemade cherry pie filling, and topped with a buttery cinnamon crumb topping. They have all the flavor of a classic Dutch cherry pie, but in perfectly portioned, handheld form.
If full-sized pies feel intimidating, this recipe is for you. These mini cherry pies are simple, approachable, and made with real ingredients — no canned pie filling required.
And that’s exactly what we do here at My Colorado Kitchen — where real ingredients meet everyday cooking.
Why You’ll Love These Mini Cherry Pies
- Made with homemade cherry pie filling
- Perfect for holidays, summer gatherings, or just when you are craving pie
- Easier than making a full pie
- Freezer friendly
- Great for gifting
- Baked right in a muffin tin
They’re beautiful enough for a holiday dessert table, but simple enough for a weeknight baking project.
Ingredients You’ll Need
Pie Crust
You’ll need 1 pie crust. I love using my homemade sourdough pie crust for extra flavor and flakiness. You can find that recipe here:
Of course, a regular homemade or store-bought crust will also work.
Homemade Cherry Pie Filling
- 4 cups frozen (or fresh) cherries
- 3/4 cup sugar
- 1/2 cup water
- 1/4 cup cornstarch
- 2 tablespoons lemon juice
- 1 tablespoon butter
- 1 teaspoon vanilla
How to Make Cherry Pie Filling from Frozen Cherries
In a saucepan, combine cherries, sugar, water, cornstarch, lemon juice, butter, and vanilla.
Bring to a boil over medium heat. Once boiling, cook for 2–4 minutes, stirring frequently, until the sauce thickens.
Remove from heat and allow to cool slightly before filling the pies.
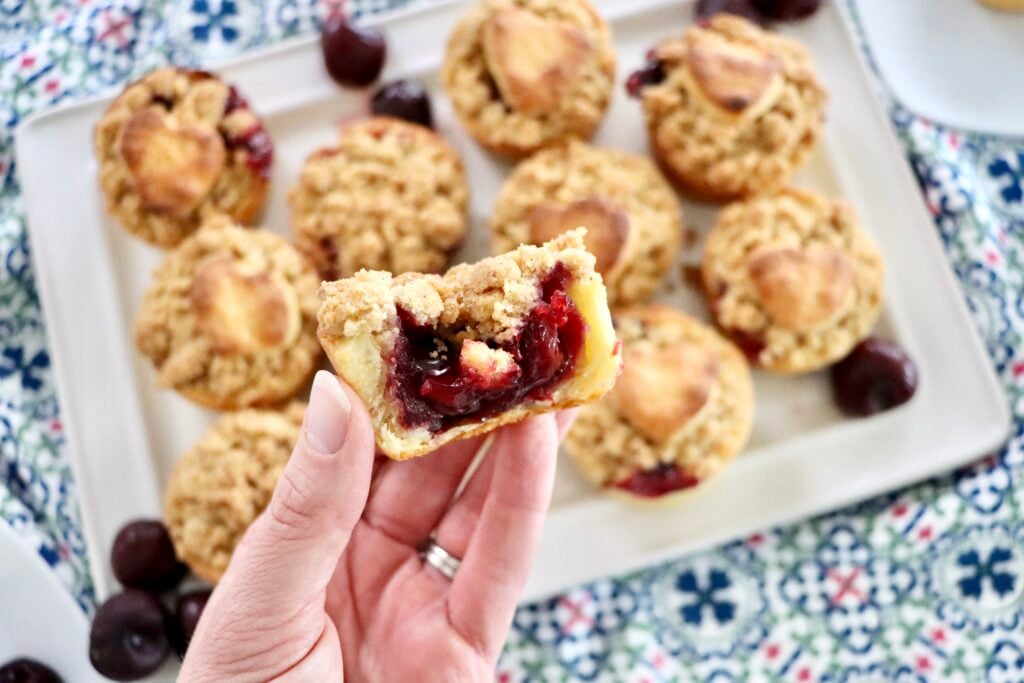
This homemade cherry pie filling is rich, glossy, and perfectly thick — without the artificial flavor you’ll find in canned versions.
Dutch Crumb Topping
- 1 cup flour
- 1/4 cup brown sugar
- 2 tablespoons sugar
- 1/2 teaspoon cinnamon
- 1/4 teaspoon salt
- 8 tablespoons softened butter
In a bowl, combine flour, brown sugar, sugar, cinnamon, and salt. Add softened butter and using a pastry cutter mix until crumbly.
This crumb topping is what makes it “Dutch” style — instead of a traditional top crust, we use a buttery streusel topping.
How to Make Mini Dutch Cherry Pies
Step 1: Prepare the Crust
Roll your pie dough out to about 1/4 to 1/8 inch thick.
Using a 4-inch round cutter (or I use these Weck jar lids as a guide and cut around them with a knife), cut 12 circles.
Press each circle gently into a muffin tin cavity.
I highly recommend using a silicone muffin tin for easy removal after baking.
For a visual walkthrough of this process, be sure to watch my YouTube video below.
Step 2: Fill the Mini Pies
Using a 2-tablespoon cookie scoop, add one scoop of cherry pie filling into each crust.
Be careful not to overfill — the filling will bubble as it bakes.
Step 3: Add the Crumb Topping
Sprinkle the crumb topping generously over each mini pie.
Don’t press it down — you want it loose and crumbly so it bakes into that beautiful golden topping.
Step 4: Bake
Bake at 425°F for 25–30 minutes.
The tops should be golden brown and the filling should be bubbling around the edges.
Allow the pies to cool before removing from the muffin tin.
Optional Decorative Ideas
If you have leftover pie crust, roll it out and cut shapes with cookie cutters.
Place the cutouts on top of the crumb before baking for a beautiful presentation.
What to Do with Leftover Cherry Pie Filling
If you have extra filling, don’t let it go to waste!
You can use it in my homemade poptarts recipe — they make the perfect cherry-filled breakfast treat.
Other ideas:
- Spoon over yogurt
- Top vanilla ice cream
- Add to sourdough toast
- Swirl into oatmeal
Homemade cherry filling keeps well in the refrigerator and is incredibly versatile.
Tips for Perfect Mini Cherry Pies
- Don’t overfill the crusts.
- Place your muffin tin on a baking sheet in case filling bubbles over.
- Let the pies cool before removing them.
- If using fresh cherries, they may cook slightly faster.
- Silicone muffin tins release the pies much more easily than metal ones.
Storage Instructions
- Store at room temperature for 1–2 days, loosely covered.
- For longer storage, refrigerate up to 5 days.
Can You Freeze Mini Cherry Pies?
Yes!
- Allow them to cool completely, then freeze in an airtight container.
- To reheat, bake at 300°F until warmed through.
They make an excellent make-ahead dessert for holidays and gatherings.

Frequently Asked Questions
These mini Dutch cherry pies are the perfect handheld dessert made with homemade cherry pie filling and a buttery crumb topping. Easy, from-scratch, and perfect for any season.
If you try these Mini Dutch Cherry Pies, I would love for you to leave a comment and rating below. It helps others find the recipe and supports my small business more than you know.
And if you love from-scratch recipes made simple, be sure to explore more here at My Colorado Kitchen — where real ingredients meet everyday cooking. ❤️
Don’t forget to pin this for later!

Mini Dutch Cherry Pies
These Mini Dutch Cherry Pies are baked in a muffin tin with homemade cherry pie filling and buttery crumb topping. Easy, from-scratch and the perfect handheld dessert!
Ingredients
Cherry Pie Filling
- 4 cups fresh or frozen cherries
- 3/4 cup granulated sugar
- 1/2 cup water
- 1/4 cup cornstarch
- 2 tablespoons lemon juice
- 1 tablespoon butter
- 1 teaspoon vanilla extract
Dutch Crumb Topping
- 1 cup all-purpose flour
- 1/4 cup brown sugar
- 2 tablespoons granulated sugar
- 1/2 teaspoon ground cinnamon
- 1/4 teaspoon salt
- 8 tablespoons (1/2 cup) softened butter
Instructions
Step 1: Make the Cherry Pie Filling
- In a medium saucepan, combine 4 cups cherries, 3/4 cup sugar, 1/2 cup water, 1/4 cup cornstarch, 2 tablespoons lemon juice, 1 tablespoon butter, and 1 teaspoon vanilla.
- Bring the mixture to a boil over medium heat, stirring frequently.
- Once boiling, cook for 2–4 minutes until the filling has thickened and becomes glossy.
- Remove from heat and allow to cool slightly while preparing the crust.
Step 2: Prepare the Pie Crust
- Preheat oven to 425°F.
- Roll out the pie dough to about 1/4 to 1/8 inch thick.
- Cut 12 circles about 4 inches in diameter.
- Gently press each circle into the wells of a muffin tin.
- Set aside while preparing the crumb topping.
Step 3: Make the Crumb Topping
- In a medium bowl, whisk together 1 cup flour, 1/4 cup brown sugar, 2 tablespoons sugar, 1/2 teaspoon cinnamon, and 1/4 teaspoon salt.
- Add 8 tablespoons softened butter.
- Mix with a pastry cutter, fork or your fingers until the mixture forms coarse crumbs.
Step 4: Assemble the Mini Pies
- Using a 2-tablespoon cookie scoop, add one scoop of cherry pie filling into each prepared crust.
- Sprinkle crumb topping generously over each mini pie.
- If desired, use leftover pie dough to cut decorative shapes and place on top.
Step 5: Bake
- Bake for 25–30 minutes, or until the crumb topping is golden brown and the filling is bubbling.
- Allow pies to cool before carefully removing from the muffin tin.
- Serve warm or at room temperature.
Notes
- You can use fresh or frozen cherries for the filling. If using frozen, there is no need to thaw before cooking.
- Do not overfill the mini pies. The filling will bubble while baking and may spill over if too full. Placing the muffin tin on a baking sheet helps catch any drips.
- A silicone muffin tin makes removal much easier. If using a metal pan, allow the pies to cool completely before gently loosening with a knife.
- Leftover cherry pie filling can be stored in the refrigerator for up to 5 days and used in homemade poptarts, spooned over yogurt, or served with ice cream.
- If you have extra pie dough, roll it out and cut decorative shapes with cookie cutters to place on top before baking.
- These mini Dutch cherry pies can be stored at room temperature for 1–2 days or refrigerated for up to 5 days.
- To freeze, allow pies to cool completely, then store in an airtight container for up to 3 months. Reheat at 300°F until warmed through.
- For best texture, allow the pies to cool before serving so the filling fully sets.
Nutrition Information:
Yield: 12 Serving Size: 1 Mini PieAmount Per Serving: Calories: 333Total Fat: 9gSaturated Fat: 5gUnsaturated Fat: 4gCholesterol: 23mgSodium: 149mgCarbohydrates: 60gFiber: 3gSugar: 34gProtein: 4g
Nutrition facts are calculated automatically and are approximate.