Vintage Easter Cake (4 Layers) – A Classic Springtime Dessert
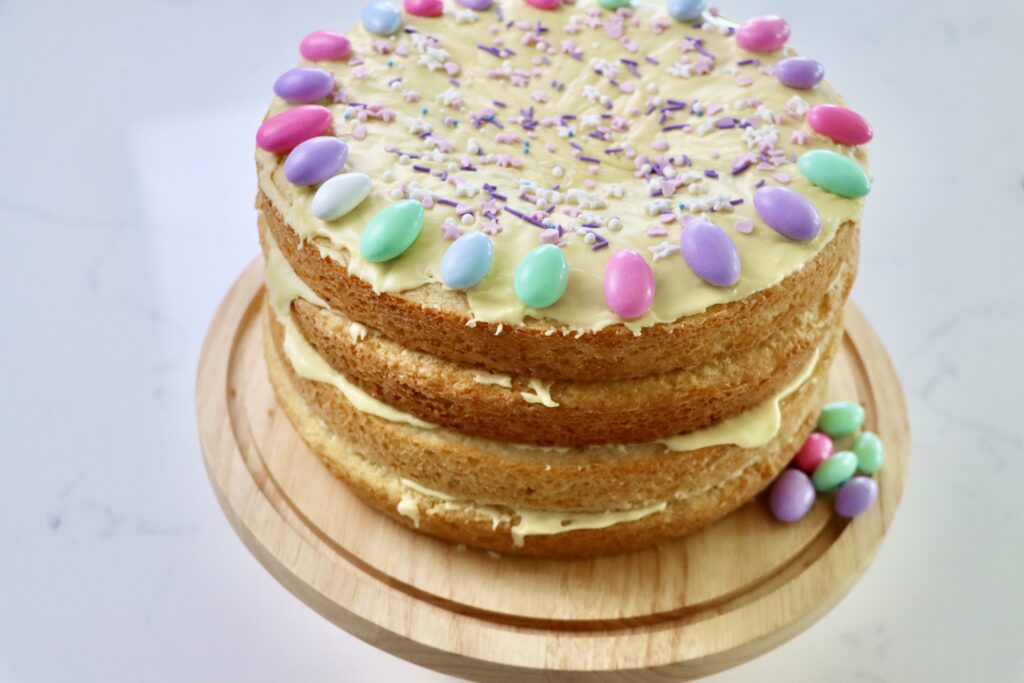
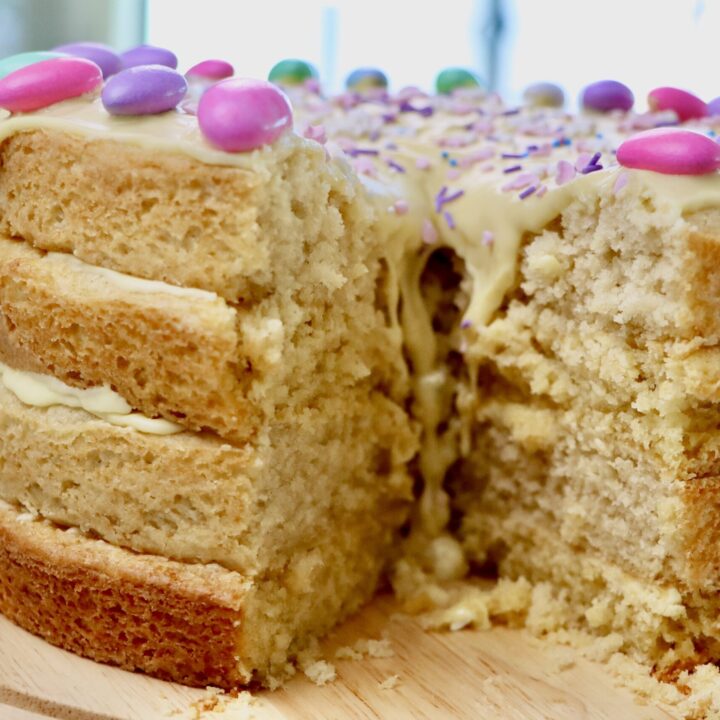
Bake a stunning 4-layer Vintage Easter Cake with soft yellow and white cake layers, a bright citrus frosting, and festive candy eggs. This from-scratch Easter cake recipe is perfect for spring celebrations!
This post may contain affiliate links. As an amazon associate I earn from qualifying purchases at no additional cost to you.
Looking back at some of my Grandma’s things, she mentions an Easter Cake that her family would make every year on Easter. I did some digging, and this 4-layer Vintage Easter Cake is the result of that. It isn’t just delicious—it’s a celebration of history, tradition, and homemade baking the way my Grandma and generations before her would do it. The combination of separate yellow and white cake layers, citrus frosting, and classic decorations makes it feel like a recipe that was passed down for generations (and I am sure it is very similar to the one she used). I hope you enjoy the history and the amazing taste of this Vintage 4-layer Easter Cake with me.
The Story Behind This Vintage Easter Cake
The History of Layer Cakes for Easter
- Layer cakes have been a part of Easter celebrations for centuries, especially in European and American baking traditions. In the 19th and early 20th centuries, home bakers would create elaborate multi-layer cakes for special occasions, including Easter, to symbolize abundance, renewal, and joy—themes deeply tied to spring and the holiday itself.
Why Layer Cakes Became an Easter Tradition
- Symbolism – Easter cakes were often light and airy, representing new beginnings and spring’s renewal.
- Seasonal Ingredients – Cakes featured fresh eggs, butter, and citrus—all ingredients that became more available as winter ended.
- Decorative Appeal – Easter cakes were made bright and festive with natural flavorings like citrus, vanilla, and almond, along with springtime decorations such as candied fruits, sugared flowers, or tiny chocolate eggs.
How this 4-Layer Vintage Easter Cake Reflects Traditional Baking Techniques
- This cake recipe beautifully mirrors the baking methods of past generations:
- Separate Yellow and White Layers
- Traditional cakes often featured yellow and white layers due to the way eggs were used. Before the widespread use of chemical leaveners (like baking powder and baking soda) in the late 19th century, cakes relied on beaten egg whites for lightness.
- The yellow layers in this recipe, made with egg yolks, create a rich and tender crumb, while the white layers, made with egg whites, have a lighter, more delicate texture. This was a classic method used in early layer cakes to create both a visual and textural contrast.
- Old-Fashioned Citrus Frosting
- Many vintage cakes featured citrus-based frostings because fresh citrus (like oranges and lemons) was considered a luxury in the colder months and a celebration of spring.
- This cakes frosting combination of fresh orange juice, zest, and lemon juice reflects how bakers once relied on natural flavors instead of artificial extracts.
- The use of egg yolks in the frosting is also a nod to vintage European buttercream recipes, which often incorporated egg yolks or egg whites for silkiness.
- Hand-Decorated with Tiny Egg Candies
- Before modern food coloring and piping techniques, Easter cakes were decorated with simple but meaningful touches, such as candied eggs, sugared almonds, or pressed edible flowers.
- The use of tiny egg candies or sugared almonds aligns perfectly with the old-world Easter cake tradition, bringing a playful and festive element to the final presentation.
- Separate Yellow and White Layers
Ingredients You’ll Need
Yellow Cake Layers (Creating a Rich, Buttery Flavor):
- Butter – I like to use grass-fed butter as it is a richer flavor with better nutrients
- Sugar – organic if possible
- 3 Egg Yolks – save the egg whites for the white cake layers
- Vanilla – if at all possible try to find a good quality vanilla (or make your own)
- All Purpose Flour – organic if possible
- Baking powder – use one without aluminum (I use this one)
- Salt – a good quality salt makes all the difference (my favorite – and trust me when I say I LOVE salt)
- Milk – I prefer raw milk, but it is hard to find in Colorado, so I try to use Kalona or if I can’t find that I buy a grass-fed organic brand.
White Cake Layers (Creating a Light, Fluffy Texture):
- All of the ingredients are the same as the yellow cake layers except you will use egg whites instead of egg yolks.
Orange Frosting (Zesty and Citrusy) :
- Zest of 1 Orange
- Juice of 1 Orange
- Lemon juice
- Powdered Sugar
- Egg Yolk
Step-by-Step Instructions
1. Preparing the Cake Layers
Yellow Cake Layers:
- Preheat your oven to 350ºF.
- Prepare two 8 or 9 inch round cake pans by greasing them with butter and adding a thin layer of flour (see my YOUTUBE video below for a visual of this)
- In a stand mixer with the paddle attachment (or with a handheld mixer) cream the butter and sugar until smooth.
- Add the egg yolks and vanilla and beat until smooth, scraping down the sides of the bowl as necessary.
- In a separate bowl mix the flour, baking powder and salt.
- Add the flour mixture alternatively with the milk to the mixer and mix until all ingredients are incorporated.
- Bake for 20-25 minutes until a toothpick inserted in the middle comes out clean.
- Remove from the oven and allow to cool on a rack for 10-15 minutes before removing from the pan.
WHITE Cake Layers:
- While the yellow cake layers are cooking you will mix the white cake layers.
- Follow the steps above for the yellow cake layers except you will use egg whites instead of egg yolks.
- Before inserting the egg whites in the recipe, be sure to stiffly beat them. You can do this with a handheld mixer, by hand with a whisk, or with your stand mixer before starting the cake making process.
2. Making the Vintage Orange Frosting
- While your white cake layers are cooking, in a small bowl combine the orange zest and orange juice with the lemon juice. Let stand 15 minutes then strain.
- In a large bowl add your strained juice mix to your egg yolk and mix until smooth.
- Add in the powdered sugar and stir until combined and the right consistency is reached. Depending on how juicy your orange is you may have to add or subtract the amount of powdered sugar.
- Note: this is a thinner frosting than a typical buttercream/cake frosting.
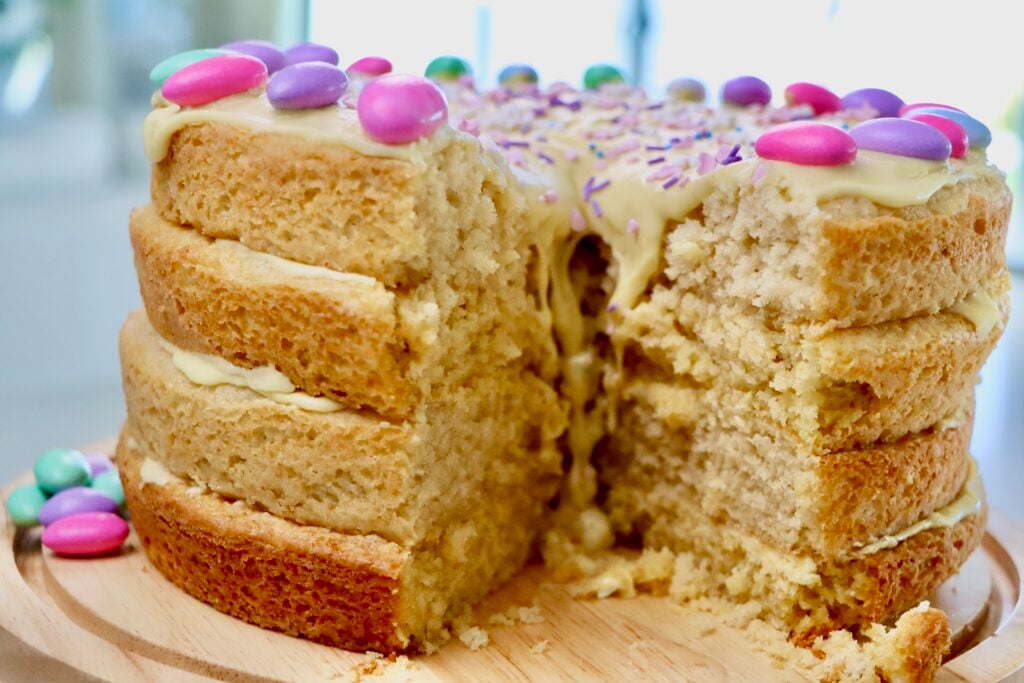
3. Assembling the Cake
- Once both the yellow and white cakes are cooled you will then assemble the 4-layer cake.
- Alternating between the white and yellow, stack the layers on top of each other spreading a thin layer of frosting in-between each layer.
- Add the remaining frosting to the top of the cake.
- Press tiny egg candies (or sugar coated almonds, sprinkles, edible flowers etc.) on top for decoration before the frosting hardens.
Serving and Storing Your Easter Cake
- This cake is best stored covered on the counter and eaten within 3-4 days.
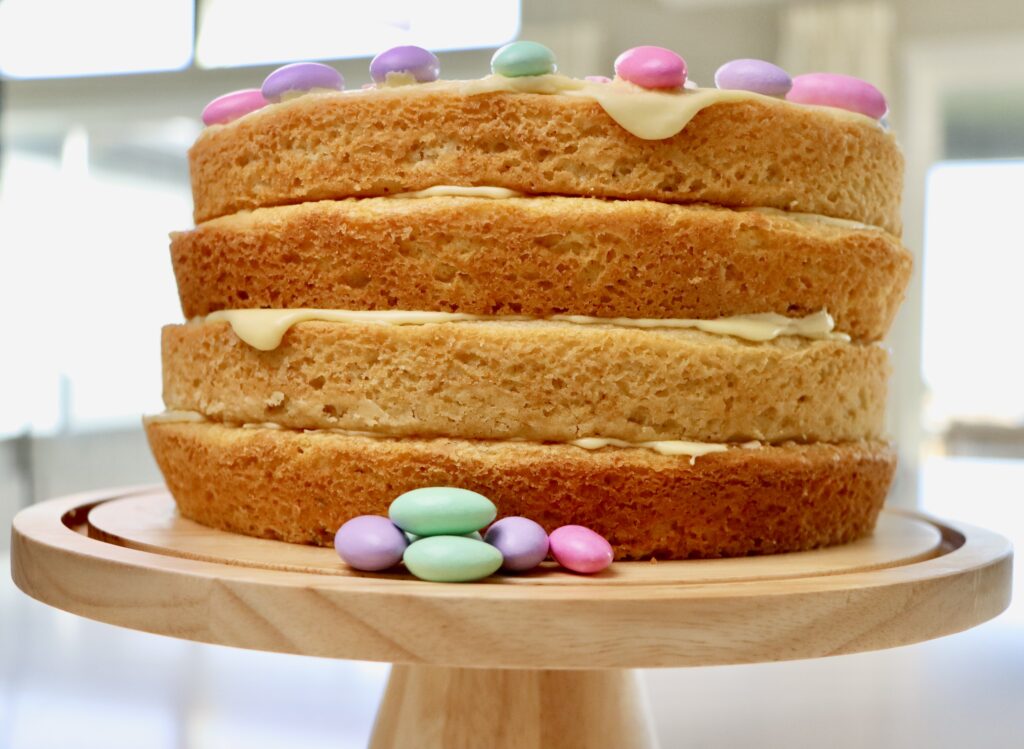
- The 4 layers make a very tall cake. It is best if you have a cake stand with a tall lid as to not ruin the frosting.
- Even though it is called an Easter cake it really does make a wonderful spring (or anytime) cake with the bright citrusy flavors.
Other Favorite
Easter Recipes
If you try this recipe and love it, I would love it if you could come back and give it 5 stars! Tag me on instagram @my.colorado.kitchen
Vintage Easter Cake
Bake a stunning 4-layer Vintage Easter Cake with soft yellow and white cake layers, a bright citrus frosting, and festive candy eggs. This from-scratch Easter cake recipe is perfect for spring celebrations!
Ingredients
Yellow Layer Cakes
- 1/2 Cup Butter
- 1 Cup Sugar
- 3 Egg Yolks
- 1 tsp Vanilla
- 2 Cups All-Purpose Flour
- 3 tsp Baking Powder
- 1/2 tsp Salt
- 1 Cup Milk
White Layer Cakes
- 1/2 Cup Butter
- 1 Cup Sugar
- 3 Egg Whites
- 1 tsp Vanilla
- 2 Cups All-Purpose Flour
- 3 tsp Baking Powder
- 1/2 tsp Salt
- 1 Cup Milk
Zesty Orange Frosting
- Zest of 1 Orange
- Juice of 1 Orange
- 1 tsp Lemon Juice
- 1 Egg Yolk
- 4 Cups Powdered Sugar
Cake Decoration
- Egg Shaped Candies, Candy Coated Almonds, Sprinkles etc. for Decorating
Instructions
1. Preparing the Cake Layers
Yellow Cake Layers:
White Cake Layers:
2. Making the Vintage Orange Frosting
3. Assembling the Cake
Notes
- This cake is best stored covered on the counter and eaten within 3-4 days.
- The 4 layers make a very tall cake. It is best if you have a cake stand with a tall lid as to not ruin the frosting.
Nutrition Information:
Yield: 16 Serving Size: 1Amount Per Serving: Calories: 740Total Fat: 15gSaturated Fat: 9gUnsaturated Fat: 6gCholesterol: 82mgSodium: 494mgCarbohydrates: 143gFiber: 2gSugar: 92gProtein: 9g
Nutrition facts are calculated automatically and are approximate.