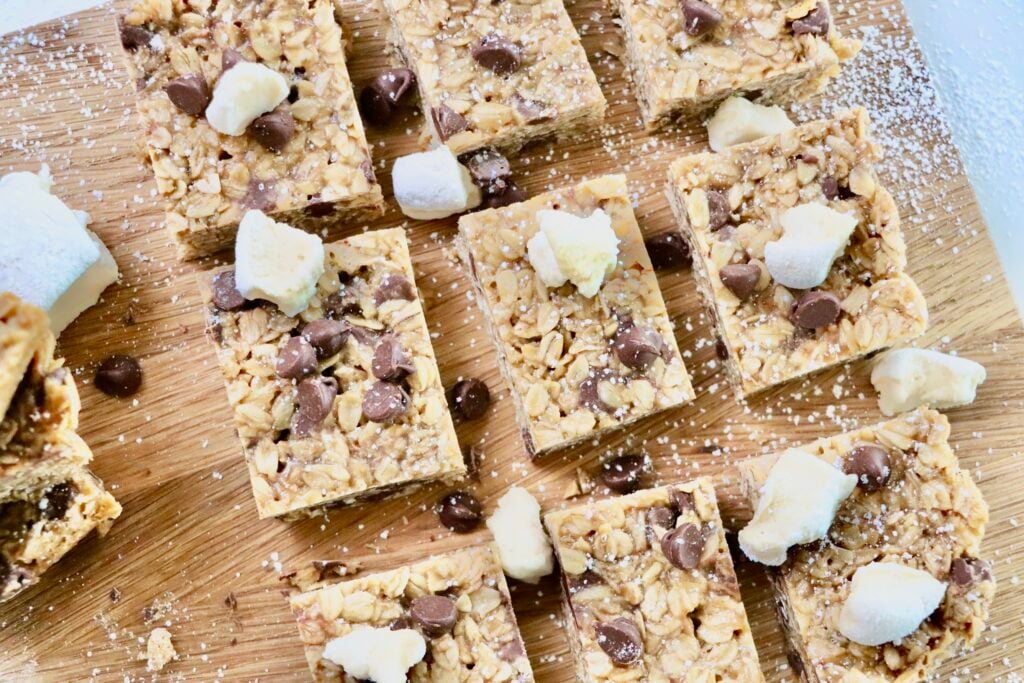
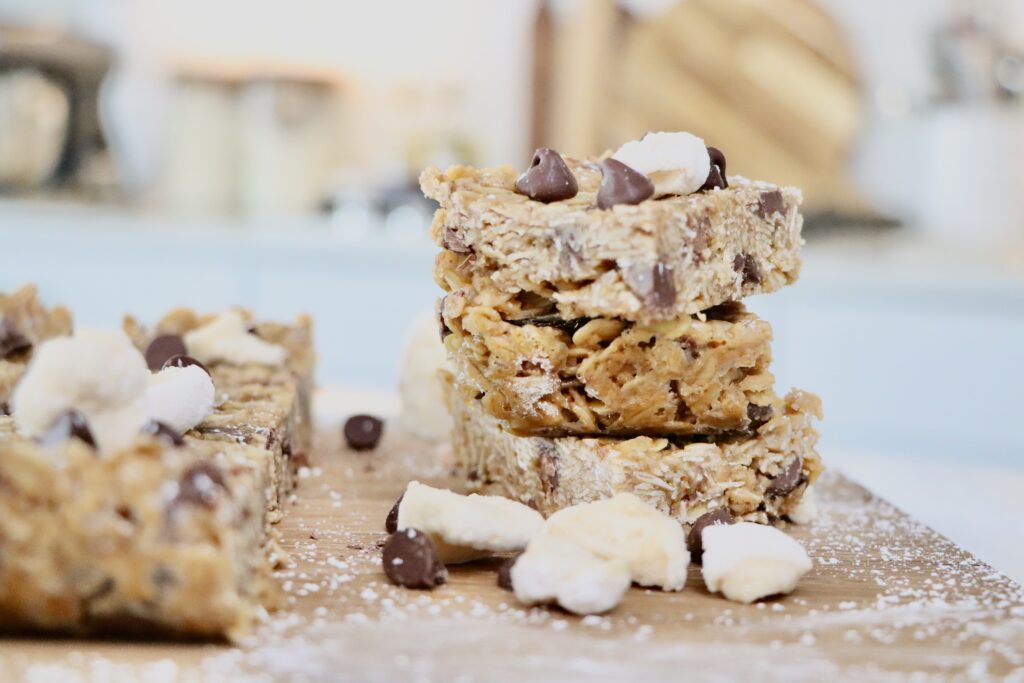
Chewy Peanut Butter Marshmallow Chocolate Chip Granola Bars (with Homemade Marshmallows)
These chewy peanut butter marshmallow chocolate chip granola bars are made with sprouted oats and homemade marshmallows for a wholesome, flavorful snack you’ll love. Easy to make, perfectly chewy, and kid-approved!
This post may contain affiliate links. As an amazon associate I earn from qualifying purchases at no additional cost to you.
If you’ve only ever had store-bought granola bars, you’re in for a treat. These chewy peanut butter marshmallow chocolate chip granola bars are a whole new level — made with sprouted oats for better nutrition and easier digestion, and my homemade marshmallows for that perfectly soft, chewy sweetness without all the additives.
This is exactly the kind of recipe I love to share here at My Colorado Kitchen — where real ingredients meet everyday cooking. These bars are quick to make, totally customizable, and strike that perfect balance between a wholesome snack and a fun little treat.
Bonus – these are kiddo approved, and make great lunch box additions! Need more kiddo approved snacks? Check them out here!
Why I Use Homemade Marshmallows + Sprouted Oats
Why homemade marshmallows?
Once you make your own marshmallows, you’ll never go back. They’re softer, more flavorful, and made with real ingredients — no corn syrup or mystery additives. They also melt differently than store-bought, which gives these granola bars their signature chewy texture. Get my homemade marshmallow recipe here!
Why sprouted oats?
Sprouted oats are oats that have been soaked and allowed to sprout before drying. This process makes them easier to digest, more nutrient-dense, and adds a subtle flavor that makes these bars extra delicious. If you’ve never baked with sprouted oats, this recipe is the perfect place to start.
Why You’ll Love These Granola Bars
If you’ve been hunting for a granola bar that’s actually chewy and holds together, this is it. These peanut butter marshmallow chocolate chip bars hit all the right notes:
- Chewy, soft texture — no crumbling all over the place.
- Kid-friendly and lunchbox-approved — they taste like a treat but use whole, real ingredients.
- Sweet, salty, and satisfying — with a little protein boost from peanut butter and collagen.
- Simple to make — one bowl, a quick bake, and done.
- Made with sprouted oats — easier to digest and packed with nutrition.
- Homemade marshmallows — a cleaner, from-scratch swap for store-bought, with better flavor and texture.
Key Ingredients & Why They Work
Sprouted Old-Fashioned Rolled Oats – A more nutrient-dense, gut-friendly base for our bars. These are my favorite! Note: If you don’t have sprouted oats you can substitute regular rolled oats.
Homemade Marshmallows – No corn syrup or additives, just fluffy, real-ingredient sweetness. Get the Recipe Here!
Peanut Butter – Adds flavor and acts as a natural binder, keeping the bars together. Opt for one with no added sugar.
Maple Syrup + Coconut Sugar – A natural way to sweeten and bind without the need for corn syrup.
Butter – Adds richness and helps create that soft, chewy bite.
Chocolate Chips – Because no granola bar is complete without a little chocolate!
Step-by-Step: How to Make Peanut Butter Marshmallow Chocolate Chip Granola Bars
- Prep the pan. Line an 8×8-inch baking pan with parchment paper so you can lift the bars out easily once cooled.
- Melt the wet ingredients. In a small saucepan over low heat, melt together the butter, peanut butter, maple syrup, and coconut sugar until smooth. Stir in the vanilla and salt.
- Mix it all together. In a large bowl, combine the oats, collagen, and marshmallows. Pour the warm peanut butter mixture over the top and stir until everything is evenly coated. Fold in the chocolate chips.
- Press firmly. Transfer the mixture to the prepared pan. Press it down really firmly using the back of a spatula or a piece of parchment — this step is key for bars that don’t fall apart.
- Bake. Bake at 325°F for 15–18 minutes. The edges should be lightly golden, but the center will still look soft — that’s perfect for chewy bars.
- Cool and chill. Let the bars cool completely in the pan, then refrigerate for at least 1–2 hours before cutting. This helps them firm up for clean slices.
Tips for Perfect Chewy Bars
- Press, press, press: The more you compact the mixture before baking, the better they’ll hold together.
- Don’t overbake: Pull them out when the edges are just starting to set. They’ll firm up as they cool.
- Chill before cutting: This step makes a big difference for clean, even slices.
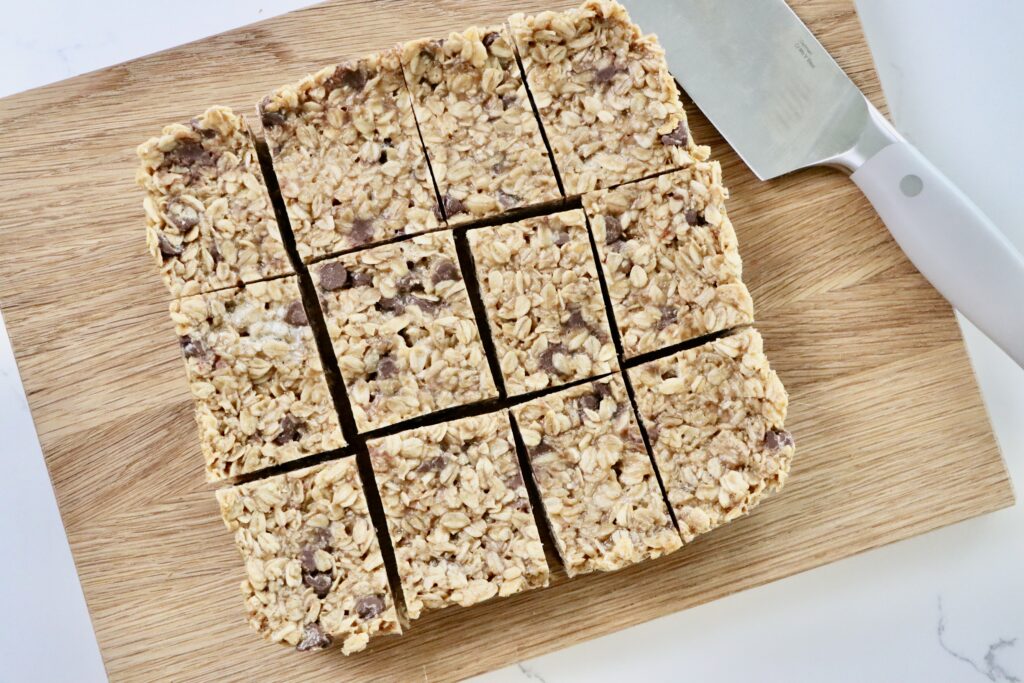
- Cut with a sharp knife: For the neatest edges, use a large chef’s knife and wipe between cuts.
- Use sprouted oats — they’re softer, easier to digest, and help give the bars a better chewy texture.
- Homemade marshmallows melt differently than store-bought, so don’t skip the chilling step for the best set.
Variations & Substitutions
- Nut-Free: Swap peanut butter for sunflower seed butter.
- Dairy-Free: Use coconut oil or a dairy-free butter alternative.
- Extra Protein: Add a little more collagen or stir in chopped nuts or seeds.
- Mix-Ins: Dried fruit, shredded coconut, or even white chocolate chips are fun additions!
Storage & Freezer Tips for These Peanut Butter Marshmallow Granola Bars
- Fridge: Store in an airtight container for up to 1 week. This keeps them firm and chewy.
- Room Temp: They’ll hold for 2–3 days in a sealed container, but will be softer.
- Freezer: Wrap bars individually in parchment or plastic wrap, then store in a freezer-safe bag for up to 2 months. Thaw in the fridge or at room temperature.
FAQs
Let Me Know If You Try It!
I’d love to hear what you think of these Chewy Peanut Butter Marshmallow Chocolate Chip Granola Bars. Leave a comment below, a 5 star rating, or Tag me on instagram @my.colorado.kitchen so I can see your delicious creations!
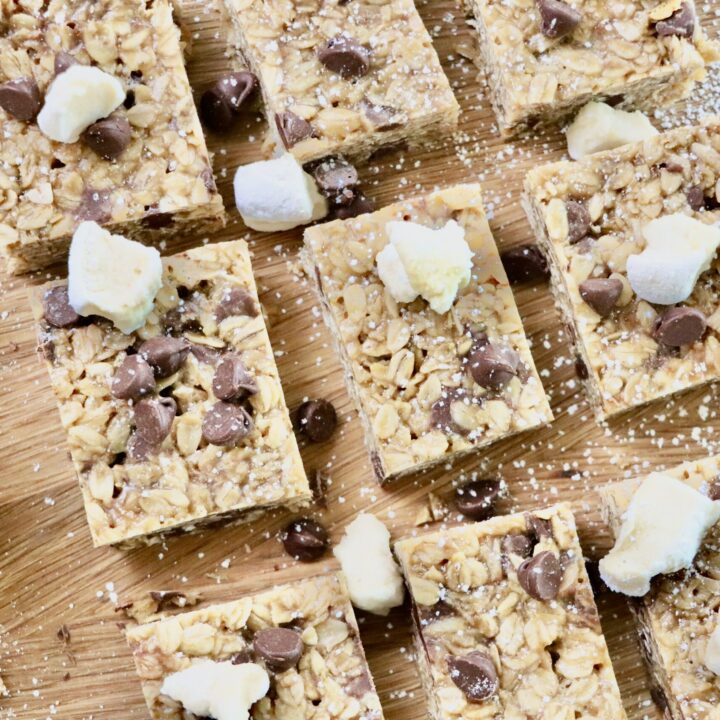
Peanut Butter Marshmallow Chocolate Chip Granola Bars
These chewy peanut butter marshmallow chocolate chip granola bars are made with sprouted oats and homemade marshmallows for a wholesome, flavorful snack you’ll love. Easy to make, perfectly chewy, and kid-approved!
Ingredients
- 3 cups sprouted rolled oats
- 1/4 cup unsalted butter
- 1/4 cup peanut butter
- 1/3 cup pure maple syrup
- 2 tbsp coconut sugar
- 1 cup homemade marshmallows, diced
- 3 tbsp collagen powder (optional)
- 1 tsp vanilla extract
- 1/2 cup chocolate chips
- 1/4 tsp salt
Instructions
- Prep the pan. Line an 8x8-inch baking pan with parchment paper so you can lift the bars out easily once cooled.
- Melt the wet ingredients. In a small saucepan over medium heat, melt together the butter, peanut butter, maple syrup, and coconut sugar until smooth. Stir in the vanilla and salt.
- Mix it all together. In a large bowl, combine the oats, collagen, and marshmallows. Pour the warm peanut butter mixture over the top and stir until everything is evenly coated. Fold in the chocolate chips.
- Press firmly. Transfer the mixture to the prepared pan. Press it down really firmly using the back of a spatula or a piece of parchment — this step is key for bars that don’t fall apart.
- Bake. Bake at 325°F for 15–18 minutes. The edges should be lightly golden, but the center will still look soft — that’s perfect for chewy bars.
- Cool and chill. Let the bars cool completely in the pan, then refrigerate for at least 1–2 hours before cutting. This helps them firm up for clean slices.
Notes
Tips for Perfect Chewy Bars
- Press, press, press: The more you compact the mixture before baking, the better they’ll hold together.
- Don’t overbake: Pull them out when the edges are just starting to set. They’ll firm up as they cool.
- Chill before cutting: This step makes a big difference for clean, even slices.
- Cut with a sharp knife: For the neatest edges, use a large chef’s knife and wipe between cuts.
- Use sprouted oats — they’re softer, easier to digest, and help give the bars a better chewy texture.
- Homemade marshmallows melt differently than store-bought, so don’t skip the chilling step for the best set.
Storage & Freezer Tips
- Fridge: Store in an airtight container for up to 1 week. This keeps them firm and chewy.
- Room Temp: They’ll hold for 2–3 days in a sealed container, but will be softer.
- Freezer: Wrap bars individually in parchment or plastic wrap, then store in a freezer-safe bag for up to 2 months. Thaw in the fridge or at room temperature.
Nutrition Information:
Yield: 12 Serving Size: 1 BarAmount Per Serving: Calories: 228Total Fat: 10gSaturated Fat: 4gTrans Fat: 0gUnsaturated Fat: 5gCholesterol: 10mgSodium: 84mgCarbohydrates: 31gFiber: 3gSugar: 14gProtein: 6g
Nutrition facts are calculated automatically and are approximate.